Contacts
Under the phone settings you define the contact list for the Names menu in the watch. Contacts can be designated as a person who can receive a help request (SOS) call.
Each contact is assigned a number: Contact 1, Contact 2, etc. The order is significant as it determines the order of the contacts under the Names menu as well as which number is called first, second, third and so forth when an SOS call is made.
You can change the order of contacts using the up-down arrows to the right of the entry. This changes the dialing order for help requests and the display order in the watch Names menu.
The available phone settings are explained in more detail in the table below.
| Setting | Description |
|---|---|
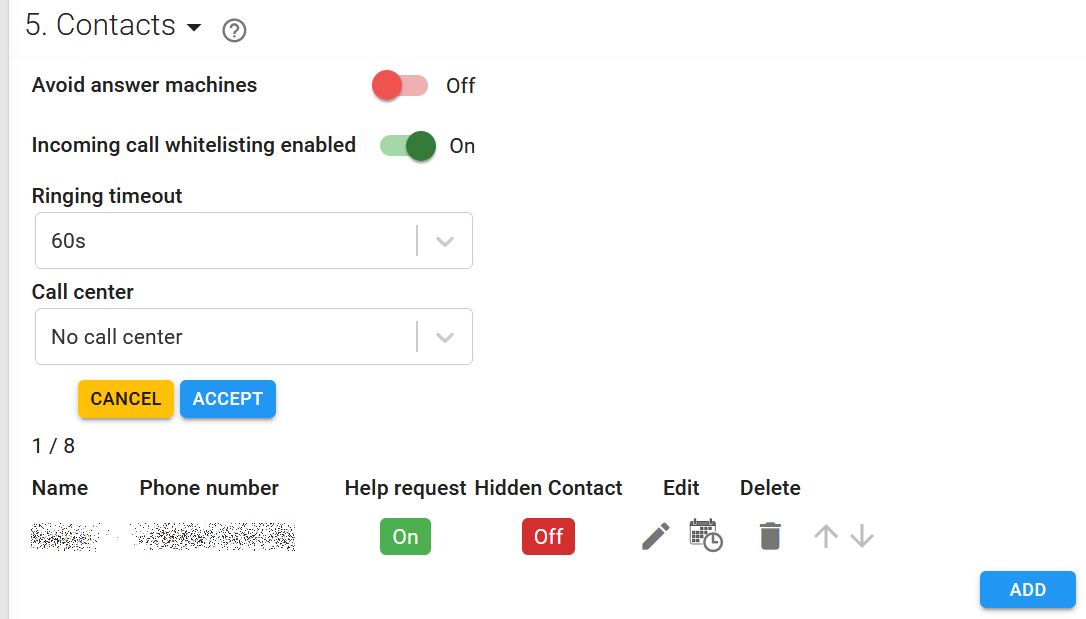
| Avoid answer machines | Toggle on to require an answer confirmation from the call receiver. If the call is not confirmed, the call is transferred to the next person on the contact list. |
| Incoming call whitelisting enabled | Toggle on to only allow calls to the watch from numbers in the phone number list. |
| Ringing timeout | Select how long, for 30 to 120 seconds, the watch should attempt to call this contact. After the timeout period, the call is automatically transferred to the next person on the contact list. |
| Call center | If call centers are defined for your company, you can define a call center for this device. All SOS calls are automatically routed to the specified call center. Note Call center numbers can only be added by Navigil admins. |
| Name | Provide a name for the contact. This name appears in the Names menu on the watch display, so the name should be something the watch wearer readily recognizes. |
| Phone | Provide the phone number for the contact using the international format: +(country-code)(phone-number). |
| Provide a valid email address (optional) | |
| Help request | Toggle on (green) to enable this contact to receive help request calls. |
| Hidden contact | Toggle on (green) to not show the contact in the watch Names menu. Hidden contacts can only be viewed in the Service by company admins. |
Contact schedules
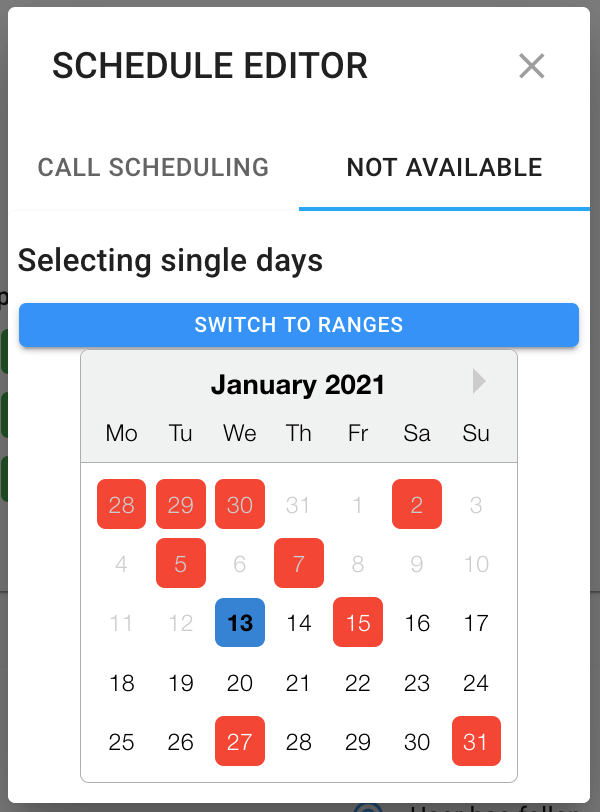
All contacts are available at all times by default. If a contact is only reachable on certain days or during certain times, you can set the person’s availability with the contact schedule. During the time(s) when a contact is unavailable, SOS calls skip the number and are automatically routed to the next available contact.
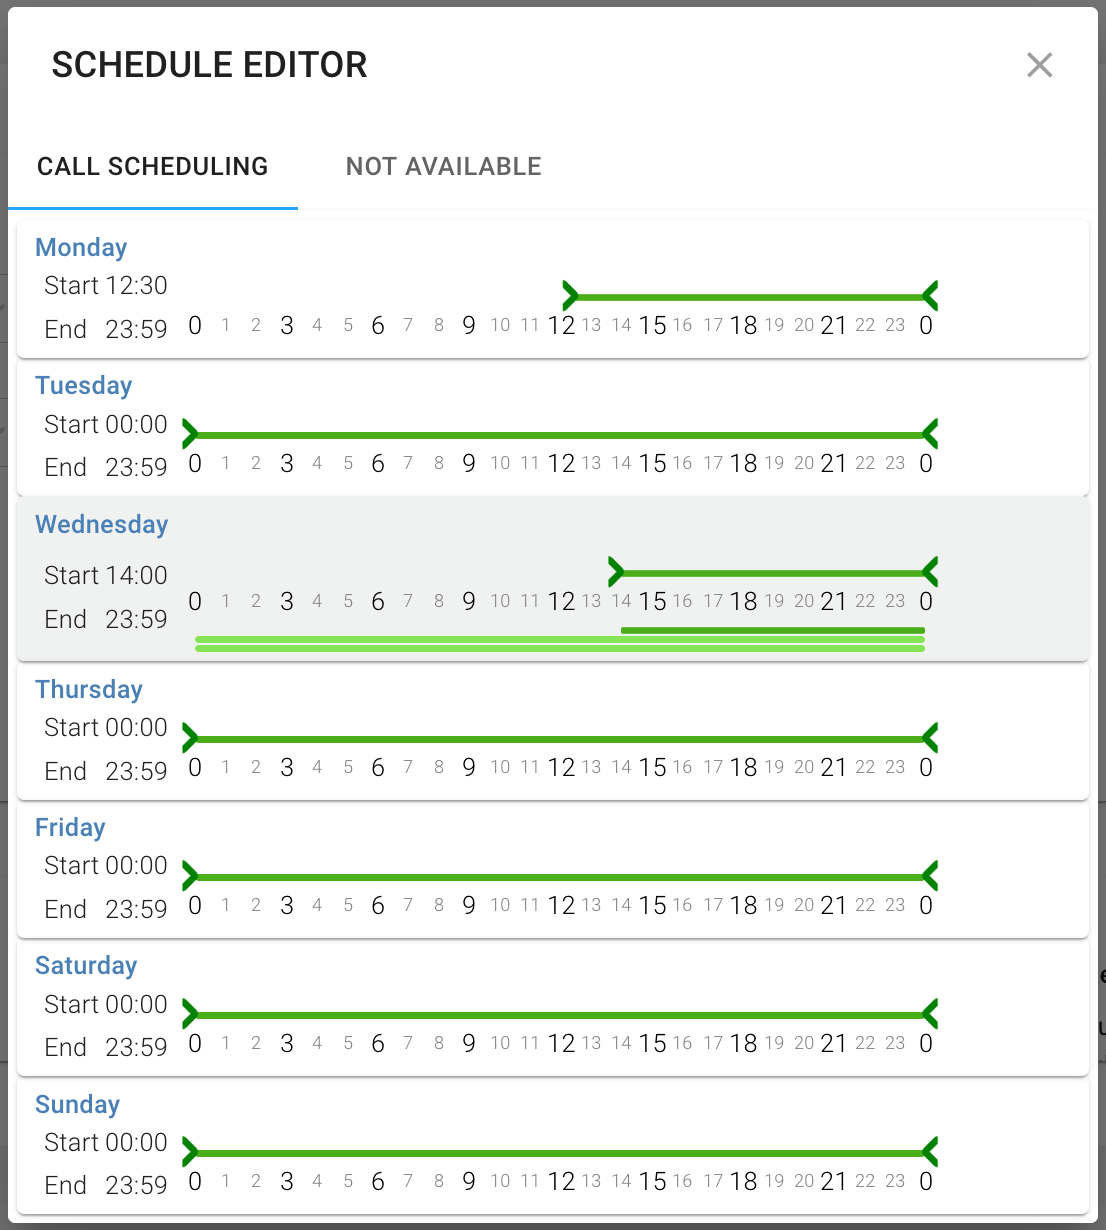
To edit contact schedules, click the calendar icon to the right of the person’s phone number. This opens the day view of the schedule editor. Each day has a 24-hour slide for setting when the contact is available. The dark green line below the day hours shows the available time of the person’s schedule you are currently editing. Light green lines below that dark green line indicate when other contacts are available on that day. In the screenshot below, for example, there are two other contacts available on Wednesdays all day.
You can also set days or ranges of days when a person is not available. Click the NOT AVAILABLE tab to mark when the contact is not available at all (at any time on the given day).